Principals of Lightfighting


20171001_paramilitary_dw_5286

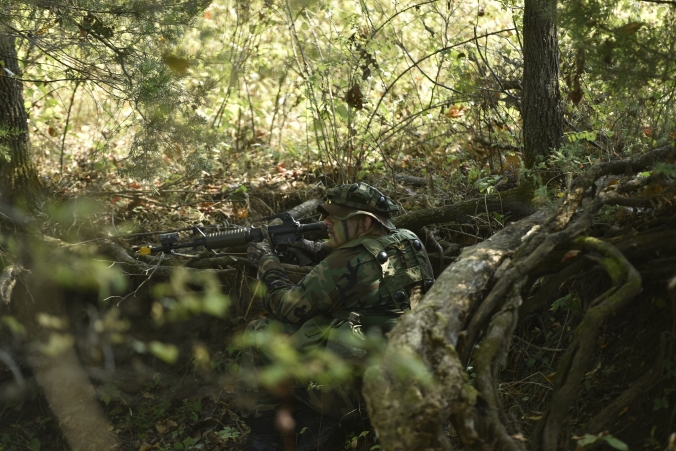
Small unit patrolling is more art than science. photo by Davis Winborne

It would be presumptuous to call these “rules”, or in any way imply that this list is definitive.

I am certainly not an expert on small unit tactics, or light infantry patrolling, but these are a few things I have learned in my time patrolling; mostly with One Shepherd, but also with S&S, and a couple of others.  It should be noted that these stem from the One Shepherd “Lightfighter” concept which is a unique doctrine that may not apply to the mission or structure of other units/organizations.  Most of these principals will represent mistakes I made myself, and the lessons learned thereby.

  1. The team that patrols the most, wins. I can say, without qualification, that in every FTX I have participated in, the most successful team is the one that patrols more.  Patrolling is your eyes and ears on the battlefield.  The more you patrol the more you disrupt and restrict the enemy’s freedom of movement.  When the entire team is pulled into a static, defensive posture, your awareness reaches no further than your field of view.  You have then ceded most of the battlespace to the enemy.
  2. Patrols need not be large to gather useful information. A two- or three- man patrol can often gather as much or more information as a squad- sized patrol, and free up manpower for other tasks.
  3. You never have people, time, and supplies in the quantity that you would like. You will have to prioritize tasks, and often must choose not to do something that is normally  deemed essential.  When you guess correctly, you will look like a genius, but when you guess incorrectly, you will look like a fool.
  4. Begin working to build team cohesion as soon as possible. As soon as you know who your team will be, have them begin doing things together. Have fire teams eat together, practice PT together, and do weapon maintenance together.  The importance of the task itself is not as great as the bond it begins to form.  The importance of this is difficult to quantify, but incredibly vital.
  5. Rehearse everything, even if the rehearsal has to be done with an improvised terrain model, with acorns representing friendly, and pinecones unfriendly operatives. Rehearsing even the simplest of operations will save you heartache later on.
  6. Written orders can save confusion, and emphasize the seriousness of a task. For example, tasks like watch rotations while the team sleeps, are often bungled because they happen in the dark, when people are exhausted.  A written watch rotation that each person looks at while it is still light, can help to keep an alert security posture.
  7. Change your batteries before it gets dark. Enough said.
  8. The most successful teams are often led by a fox and a terrier, two personality types. The fox, sly, cautious, sneaky, and risk averse; and the terrier, bold, aggressive, and vicious, often work well together.  One is better at strategy, and the other is better at kinetic operations. This combination works particularly well if the fox is patrol leader, and the terrier is his second.
  9. Communicating with your team is more important than the risk of communications being intercepted by the enemy. We do not want to give information away to the enemy, but most communication lapses stem from excessive fear of communication intercept.  The importance of your team knowing where you, are and what you are doing, usually outweighs the danger of the enemy knowing where you are, and what you are doing,.
  10. Communication is more than radio. Have more tools in you communications repertoire. Do not neglect field phones, semaphores, animal calls, flares, light flashes, and plain old shouting, just to name a few.


For more about One Shepherd go to: https://1shepherd.com/what-is-one-shepherd/

For more about S&S go to: https://www.sstrainingsolutions.com/
Un-Timed Drills

Only 18% of pistol shooters use a shot timer when they train, according to a survey by Concealedcarry .com. I believe that number may, in fact, be artificially high; very few of the gun owners I know have a shot timer.  With that in mind, I thought I would publish a few drills which can be run without at shot timer.  None of these are my own invention, and where I can recall, I will attribute the drill to the person who taught me.

One Hole Drill

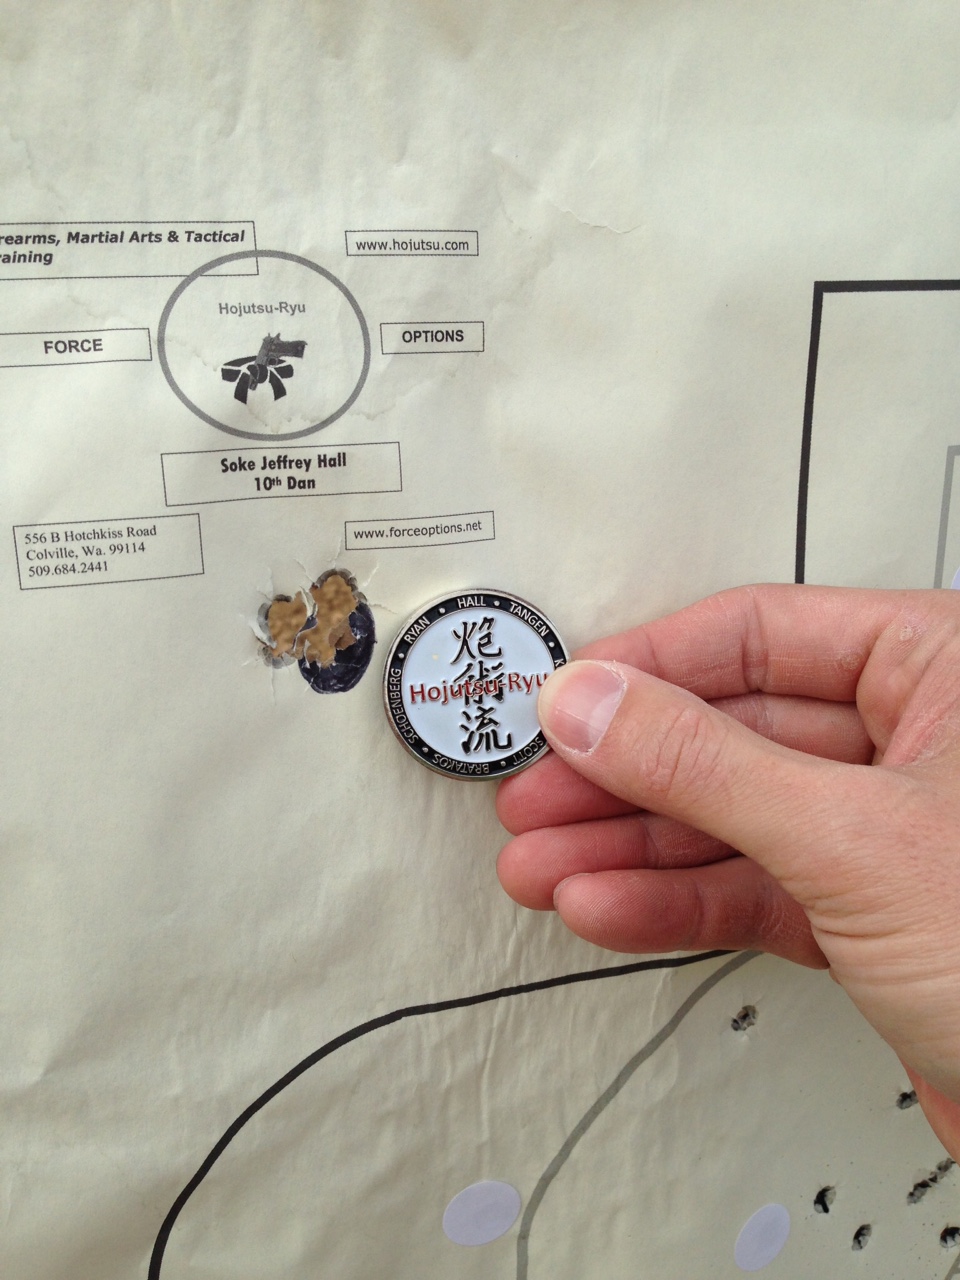
At any distance (start at three yards), put five shots into one hole.  Resist the urge to fire a sixth or seventh shot to make up for a miss.  If you need to run a second time, re holster, take a breath, and then start over. This drill is about mental focus, sight picture, and trigger control. This is, perhaps, the most important drill you can practice, working on the fundamentals.  I learned this from Jeff Hall, founder of Hojutsu.  I run this drill two or three times, every time I shoot. No matter what I do, I like to end the session with a one hole drill.  It tends to bring me back to the fundamentals.

img_0079

A very respectable one hole drill shot from 5 yards

Okey Dokey Drill

This is like the one hole drill, featuring five shots into one hole, with the single difference that you hold the pistol only with the thumb and middle finger of one hand.  Imagine holding your hand in the Okey-Dokey sign.  The purpose is to isolate the trigger from the grip.  If I have a student who has bad trigger control, an error he is trying to overcome by maintaining a death grip on his weapon, this will cure the problem. Likewise, if his trigger press is good, but his grip is torquing the weapon, this will also cure the problem. I was taught this technique by Lt. Col. Dave Grossman, who is most well known as an author, but is also an excellent pistol instructor.

Clover Leaf

This is yet another adaptation of the one hole drill (if you notice, I really like the one hole drill).  For this drill, fire three shots.  The first shot is fired with your normal, two handed grip.  The second shot uses strong hand only, and the third, weak hand only.  You want all three to touch; i.e., create a clover leaf pattern.  This drill is created to work on one hand trigger control.  I learned about this from Greg Ellifritz’s excellent blog, Active Response Training.  If you aren’t reading his blog, you are wrong.

The And Drill

 Any target will do for this drill, but try a ten inch plate at ten yards to start.  Point in on your target, and start counting: “One thousand and one, one thousand and two…”  Each time you get to the end of a number, press the trigger.  When you can keep five shots in a row on target, drop the thousands and just count, “One, and two, and…” with the trigger press at the end of each “D” in “and”.  Eventually, drop the numbers altogether, just using the word “and”. This is about tempo, coordinating sight picture with breath, and controlling recoil.  I learned this drill from D.C. Reed, of TAGtrainingllc.com

Three Steps Froward Three Steps Back

Using an IDPA sized or similar target, start at ten yards, and shoot five shots.  If they are all on target, move three steps back.   If you miss one, take three steps forward.  Eventually, you will settle into your maximum effective range for the size target you are using.  The goal is to increase your maximum effective range.  If you use a steel target for this be sure that you do not get too close to the target (most manufactures recommend no closer than ten yards).


A shot timer is a great tool, and well worth the investment. There are many skills that can only be developed with the use of a timer, but there are others that can only be mastered with slow, deliberate fire.  I use a shot timer every time I go to the range, but I still utilize a number of untimed drills, especially if I find myself becoming sloppy with my fundamentals.

You can find the article that inspired this post at https://www.concealedcarry.com/gear/shot-timer-survey-results/